Showing posts with label Food. Show all posts
I love easy fudge made with sweetened condensed milk. The more flavours I make, the more I want to try. Each one I've made has been a hit, and the recipe makes over 2 lbs so it really goes a long way. So far I've tried Reese's Fudge, Christmas Fudge, Oreo fudge, and Salted Butterscotch Fudge.

My most recent adventure was with mint chocolate fudge, and I found the recipe on Eagle Brand's website. I adjusted the method and made it in the microwave. This was the first fudge I made in the microwave, and although it was really easy, the fudge cooled a lot faster than the stove top method, so I had to move quickly to make sure it didn't set before I got it into the baking dish.  


Ingredients:
2 cups chocolate chips, divided (I used a mixture of dark and milk chocolate)
1 cup white chocolate chips
1 can sweetened condensed milk (300ml), divided
2 tsp peppermint extract
2 tsp vanilla, divided
Green food colouring

Method:
1. Line 8 x 8 square pan with parchment paper.

2. In a microwave safe bowl, melt together 1 cup chocolate chips and 1/2 cup sweetened condensed milk until blended (about one minute). Add 1 tsp vanilla and stir until combined. Spread evenly into pan for layer one of the fudge. Chill 10 minutes for layer to set.

Note: For ease of measuring the sweetened condensed milk, at this time I added the other cup of chocolate chips and another 1/2 cup of sweetened condensed milk to the microwave safe bowl. Set aside, as this will become layer three.

3. In another microwave safe bowl, add 1 cup white chocolate chips and the remainder of the sweetened condensed milk (it will be a little less than 1/4 cup). Melt in microwave until blended (about one minute). Mixture will be thick. Add peppermint extract and green food colouring and stir until combined. Spread over first layer of fudge. Chill for 10 minutes for layer to set.

4. Melt second bowl of chocolate chips and sweetened condensed milk until blended (about one minute). Add 1 tsp vanilla and stir until combined. Spread over second layer of fudge.

Chill until firm. I usually chill mine for 24 hours and it always sets up perfectly.


Posted by Jen B On Wednesday, December 03, 2014 4 comments
I visited with Mom yesterday and she surprised me with a basket full of cheese, tea, and chocolate. She put it together herself, even shredding pieces of Christmas paper to make a bed of confetti for all the treats. Isn't she the best? I would have taken a photo but I was waaaaayyyy too excited to tear open my tea (Twinings Earl Grey), put the cheese in the fridge, and put the chocolate in my face.

Because of this wonderful gift, today I woke up with Gouda in my fridge. I knew I wanted to have some sort of sammie with it for lunch, so I Googled some ideas. I found this blog post that blended spinach, avocado, and Gouda for use in a kick ass grilled cheese. My bread options were limited, so I decided to eat mine as an open face sandwich.

I added a few handfuls of spinach to my mini food processor, and pulsed it until it was nice and chopped. Then I added half an avocado and pulsed it a few times to mix it with the spinach. Lastly, I added some chopped Gouda (thanks Mom!) and processed it until it looked spreadable.


I scooped my mixture onto a toasted bagel and then broiled it for about five minutes in the oven.


Yummy!

I'm also currently making some baguette dough in the bread maker so that I can eat more wonderful and fancy cheese with fancy bread.


Posted by Jen B On Monday, December 01, 2014 4 comments
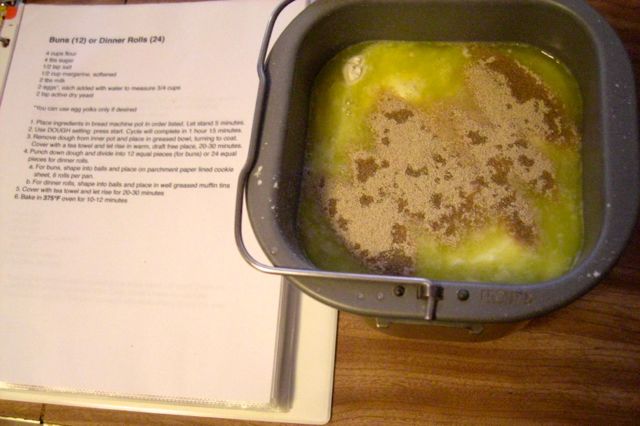
Over the weekend I made some homemade chicken soup and some homemade buns for soup and sandwich night. I've posted about the soup here, and I thought it was about time I posted my bun recipe. Using my hand-me-down and awesome bread maker, these buns are so easy to make and a weekly staple in our house. I've also used this bun recipe many times for dinner rolls, making 24 rolls instead of 12 buns.

Home Made Buns (adapted from Sanyo's The Home Bakery Book, 1988)

4 cups all purpose flour
4 tbsp sugar
1/2 tsp salt
1/2 cup margarine, softened
2 tbs milk
2 eggs, each added with water to measure 3/4 cups (or use yolk only, if desired)
2 tsp active dry yeast

1. Place ingredients in bread machine pot in order listed. Let stand 5 minutes. Use DOUGH setting and press start. Dough will be complete in 1 hour 15 minutes.


2. Remove dough from bread maker and place in a greased bowl, turning to coat.


3. Let rise 20-30 minutes.


4. Punch down dough and shape into 12 buns. I like to use a scale to get them all about the same size.


5. Let rise 20-30 minutes.


6. Bake at 375°F for 10-13 minutes.


Enjoy as part of a soup and sandwich combo for maximum enjoyment.


Posted by Jen B On Monday, October 27, 2014 9 comments
We started adding dried chives to our meals earlier this year, enhancing mac n' cheese, dressing up baked potatoes, and seasoning many other dishes. We realized we loved them in anything and everything and added them to our weekly grocery list.

We bought the store brand bag of chives, which were only $0.79 per bag and so easy to just throw into the cart. We'd pick up two or three bags at a time, as it seemed like a good deal.


I was at Bulk Barn a few weeks ago and decided to see how much bulk chives cost. They were $5.29 for 100g, which I initially thought was expensive because I'd been getting a whole bag of them for only $0.79. When I got home, I was surprised to realize that the bags I'd been buying were only 5.5g. Which meant that 100g of those chives actually worked out to $14.36! I'm so happy I looked into it, because it turns out I've been overspending on chives.

So I went back to the Bulk Barn and picked up 100g (...I got exactly 100g too, because my bulk measuring skills are awesome, apparently).


My giant bag of chives is equivalent to 18 bags of the ones I used to get. So we currently have ALL the chives and can now have as many fancy baked potatoes as we want.


Posted by Jen B On Wednesday, October 22, 2014 10 comments
I got an excellent deal on chicken wings on Monday and John quickly made them into a mouth watering meal. He works without a recipe, so I'll give you a rough idea of what he did, but mainly he just sort of winged it. (Bad puns for the win!)

First he split the wings. We had 14 full wings which made 28 split. He put them in a bowl and sprinkled them with olive oil, pepper, and Montreal steak spice (our go-to spice mix).


He spread them on a baking sheet and cooked them at a high heat (450°F) until fully cooked (about 40 minutes), flipping once. 


Once fully cooked, he added the wings to a bowl for tossing.


John made an amazing spicy BBQ sauce for them that included: prepared hickory BBQ sauce, Sriracha sauce, vinegar, chili powder, and salt + pepper. Not sure of the exact amounts of each, but it was damn good! Here are the wings right after the sauce was added. Look at them steam! It had a wonderful smell.


We snacked on wings strait from the bowl while watching the Emmys Monday night. Quite fun. The coriander seeds from the Montreal steak spice added an amazing flavour to these crispy and saucy wings.

Posted by Jen B On Wednesday, August 27, 2014 8 comments
Summer BBQ's are great for catching up with friends and family, but they are even better for all the amazing food! We went to an over-the-top BBQ at Bryan and Betony's last weekend that went beyond typical hamburgers and hot dogs (though we ate those too). There were also crab legs, lobster, shrimp, corn bread, and some home cooked baked beans. All the food was delicious and I took my hamburger up a notch by topping it with baked beans. Yum! Betony shared the baked bean recipe, which turned out to be made with canned beans instead of dry. I had two cans of beans on hand so I made some up at home. They are easy and delicious (although they do take some time in the oven).

The recipe is Simple Baked Beans from allrecipes.com.

In a large bowl, mix together two cans baked beans,1/4 cup molasses, 1/4 cup chopped onion, 1/4 cup brown sugar, 1 tbs mustard, and 2 tbs ketchup. That's it.


Put mixture into well greased baking dish (I used an 8x8 disposable one). Cover and bake at 350°F for 3 hours.


The beans thicken up beautifully and have a really sweet and smoky flavour. They are also a bit sticky and little chewy which gives them a stick-to-your-ribs feel. I served them with a bacon and egg bagel for an epic breakfast-for-dinner. So good!


At some point I still want to try making these with dry beans, but this was a fun and easy first try at this yummy dish.
Posted by Jen B On Monday, August 25, 2014 7 comments
My friend Amanda recently posted that she made Poutine Pizza. The idea was so over the top and fun sounding that it was only a matter of time before I tried it.

For anyone who doesn't know, Poutine is the wonderful mixture of french fries, cheese curds, and gravy. Seems like an odd thing to put on a pizza, but believe me, it works. Gravy is substituted for the pizza sauce, so there is no confusion of flavours.

I used Amanda's recipe, but didn't go the authentic distance and pick up cheese curds - I just used mozzarella. We also used a poutine add-in, using some deli ham that we thought would taste great on the pizza.

Step 1. Cook up some gravy. I used a package of Poutine Gravy which made 2 cups.

Step 2. Pre-cook your french fries. We used strait cut fries from a bag.

Step 3. Press your favourite pizza dough (we used homemade) into a pizza pan. Add enough poutine gravy to cover dough (as the pizza sauce).


Step 4. Cover in shredded mozzarella. Add some chopped deli ham if desired. Bake for about 20 minutes at 425°F until dough is mostly cooked. 


Step 5. Remove pizza from oven and top with pre-cooked french fries. Spread more shredded mozzarella on top.


Step 6. Top with the rest of your poutine gravy and return to the oven for about 10 minutes (or to desired melty-ness of cheese). Broil for a few minutes to get cheese to bubble.


Poutine Pizza!!!!

This was a really fun treat night meal. It tasted like two amazing things: (1) poutine and (2) fresh rolls dipped in gravy. It was a delight! It was very filling, so we ended up with leftovers that weren't as good the next day. So this might be a great pizza for sharing.


Posted by Jen B On Tuesday, August 19, 2014 9 comments
It's a holiday Monday here in Ontario and I've been having a great weekend! Lots of friends, food, fun, and activities - it is what summer is made for.

The weather has been fabulous - really hot and sunny. I started the weekend catching up with my favourite Wizard Detective, Harry Dresden. I'm about half way through and enjoying it so far.


On breaks from reading on Saturday I baked some gingerbread cookies. Always nice to have treats around on a long weekend.


Yesterday my parents came up and we went on a short visit to the beach and walked around the Elmvale Sales Barn looking for deals.


We picked up lunch at Perky's Fish and Fries, which never disappoints. I got the haddock and chips, Mom got a burger and onion rings. MMMMmmmmm....


After Mom and Dad left, my sisters in law came over on their way to the beach, dropping off garden beans and romaine. The. Best.


Adding to our fun filled day, we hosted gaming night and played a little HarnMaster style RPG and enjoyed some treats.


I made caramel corn which was a big hit.


Our friend Bryan brought some treats to share that he brought back from a trip to Ohio. I don't think you can get this stuff here, so it was neat to try.


The remainder of the weekend will be spent reading and relaxing and probably eating a lot of garden beans. Perfect!


Posted by Jen B On Monday, August 04, 2014 8 comments
I can't remember where I first saw zebra cake posted, but I do remember how fun and easy it looked to make. It had the zebra name because it was chocolate and vanilla cake baked together to look like the stripes of a zebra. I made one for fun a few months ago and I'm a sucker for any sort of surprise-inside cake, so I liked it. This time around I wanted to add some colour to it (pink!), which ended up looking like leopard print to me. I'm sure this cake could also be called marble too. Whatever you want to call it, it is a fun and tasty cake to bake.

Ingredients:
1 box white or yellow cake mix, prepared as per package directions.
            (sidenote: I always prepare cake mix with unsweetened applesauce instead of oil. It makes
             for a flavourful cake that has way less fat).
2 tbs cocoa powder
Food colour of choice (if desired)

Method:
1. Prepare cake batter and separate into two bowls. A box of cake mix will make roughly 5 cups, so I very roughly measured out 2.5 cups into a new bowl.

2. Add 2 tbs of cocoa powder to one bowl and stir to combine. Add food colouring to other bowl and stir to combine (or leave white if you want the zebra look).


3. Using a 1/4 cup measure, alternate batter into the center of greased cake pans. Just keep adding the batter to the center and gravity and the baking process will spread it all out for you. Check out this brief kitchen video I made that shows me alternating the colours:


4. Bake cake in 350°F oven. I used 8 inch round cake pans and the box suggested 26-31 minutes, but it actually took a little longer (about 38 min). I just kept checking every 3-5 minutes to see if a toothpick would come out clean. It finally did.

5. Frost and decorate to taste. I used a white frosting so that the inside would seem more surprising when cut open. The frosting I used was marshmallow buttercream (my favourite).


Once the cake was iced white I noticed I still had some buttercream leftover, so I added 1 tsp of cocoa powder to it and piped some designs along the top and bottom. Fancy eh?


Posted by Jen B On Tuesday, July 22, 2014 5 comments
I can't claim to have had a lot of stress free days lately, but today I am having one and it feels soooooo good. I am actually blogging too, which is something that always falls to wayside when I am dealing with the less fun aspects of life. But it feels good to be back at the computer and to catch up with blogs and bloggers I've missed over the past few weeks.

Today I'm celebrating being stress free by having a music/dance party. So far I'm focusing my attention on Paul McCartney's Unplugged album from 1991. It is a rocking good time and making me smile big this afternoon. I had a hard time picking which song to post from it (they are all equally good), but decided on Blue Moon of Kentucky. It starts slow but it is so much fun.


I also made and enjoyed some breakfast (late lunch) wraps that had bacon, scrambled egg, spinach, and grated cheese in them, all on homemade tortillas.


Probably going to spend the rest of my day with more music, more food, and maybe a little outdoor time when the sun is less harsh. There is a 'Very High' UV Index for us today and we don't have any shady spots free of mosquitos at the moment, so I'm staying inside until after 4:00pm or so. Playing it safe.

Posted by Jen B On Monday, May 26, 2014 7 comments
Cadbury Creme Eggs are the best. I love the week following Easter because you can get them for $0.20 a piece or less. They are the perfect mix of sweet and chocolate and I love that they are also really gooey. This year I thought I would try making them at home.

One of favourite YouTube channels, Cooking with Karma, has a great video tutorial on how to make them and I used her recipe (slightly modified). I also made a smaller batch, as I didn't want to have too many of these kicking around.

Bulk Barn had Easter candy molds on sale for $1.50, so I got one for my egg making adventure.


For this recipe I used:
1.5 cups milk chocolate chips, melted
3/4 cups of icing sugar
1 tbs butter
2 tbs corn syrup
1/2 tsp vanilla
Yellow food colouring


For the Cream Centers:
Mix butter, corn syrup, and vanilla in a bowl. Add icing sugar and mix until completely incorporated. 


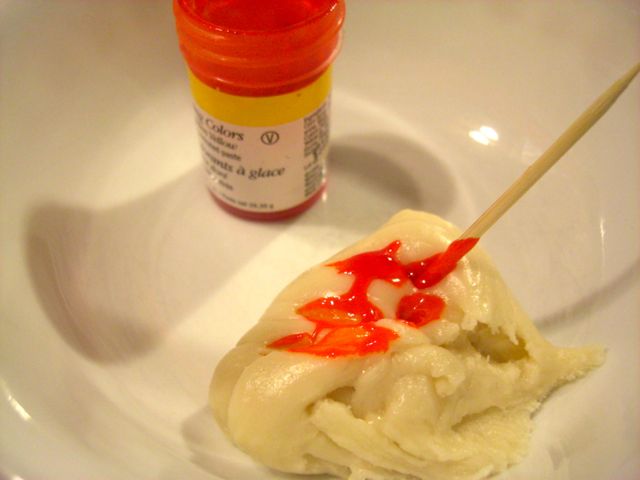
Place a third of the icing sugar mixture in a separate bowl and dye yellow for the yolks.


Add a little bit of water, a 1/4 tsp at a time to the white and yellow sugar mixtures until they are the gooey consistency of a creme egg.


For the Chocolate:
I made the eggs in two different ways.
Way one: Big Eggs.

Fill the candy egg mold completely, chill until slightly hardened (about 8 min), and scoop out the middles of the molds.

Way two: Half Eggs.
Paint egg mold with melted chocolate (I used a silicone brush). Let harden.


 For both methods, fill the eggs with white and yellow cream.


For the Big Eggs, glue eggs together with melted chocolate. For the Half Eggs, cover cream with melted chocolate.

Big Eggs:

Half Eggs:

They tasted pretty close to Cadbury Creme Eggs, but not enough to keep me from buying the real thing. I'm excited to see what else I can make with the egg molds, as chocolates are pretty tasty and they go pretty quickly in this house.


Posted by Jen B On Thursday, April 17, 2014 9 comments
Related Posts with Thumbnails
  • RSS
  • Delicious
  • Digg
  • Facebook
  • Twitter
  • Linkedin
  • Youtube

My Adorable Twitter

Let's connect!

What I'm Currently Reading

2015 Reading Challenge

2015 Reading Challenge
Jen has read 0 books toward her goal of 30 books.
hide

2014 Reading Challenge

2014 Reading Challenge
Jen has read 0 books toward her goal of 25 books.
hide

2013 Reading Challenge

2013 Reading Challenge
Jen has read 5 books toward a goal of 25 books.
hide

Suggested Reading

Suggested Reading

Good Eating

Active and Outdoorsy