Showing posts with label Recipes. Show all posts
I woke up with butter tarts on my mind, but not the proper ingredients in the house to make them. So I googled butter tart squares and found a recipe on the Robin Hood flour website that seemed easy enough. Not only were they indeed easy enough, they were so easy that I'm adding them to my regularly baked treats rotation.


I modified the recipe based on the ingredients I had on hand and followed the method on the original recipe.

Ingredients:
Base
1/2 cup margarine
1/4 cup brown sugar
1 cup flour

Filling
3/4 cup brown sugar
1/4 cup margarine
1/4 cup corn syrup
1/4 cup honey
2 eggs
1 tsp vanilla extract
2 tbs flour
1/2 tsp baking powder

Method:

1. Preheat oven to 350°F. Grease and line an 8x8 baking dish with parchment paper.

2. For the base, beat margarine and brown sugar together in a bowl with an electric mixer. Add flour and beat until combined (mine had a cookie dough like texture). Spread evenly into prepared baking dish.

3. Bake for 20 minutes.

4. For the filling, beat margarine and brown sugar in a bowl until light and creamy. Beat in corn syrup/honey, eggs, and vanilla. Stir in flour and baking powder.

5. Pour over baked base, and return to oven for 25 minutes or until set.

Just out of the oven.

Unwrapped and ready for slicing.

Butter Tart squares. Delicious!


Posted by Jen B On Monday, November 16, 2015 4 comments
'Mom's Awesome Fudge' is how this fudge recipe appears in my recipe book, although it's come to my attention that the source of this recipe goes a few generations further. I uncovered this fact after making a batch of it and being reminded of my Nanny. I asked Mom if Nanny ever made it and was informed that it was Nanny's recipe and, yes, she made it all the time. We were pretty young when we spent time with Nanny (she was Mom's grandma), so part of me forgot about it. I'm glad the recent batch I made tasted like memories, otherwise I wouldn't have realized I'd shared this treat with my Nanny when I was little.


This fudge tastes very old timey, sweet and yummy with every bite.

Mom's (Nanny's) Awesome Fudge

1/4 cup margarine
1/4 cup corn syrup
1/2 cup milk
3/4 tsp vanilla
1 cup brown sugar
1 cup white sugar
pinch salt
1/2 cup chopped walnuts (optional)

Put all ingredients except vanilla and walnuts into a saucepan. Mix together, heating on medium until margarine is melted and mixture starts to boil. Let bubble for 9-10 minutes. To ensure it has boiled enough, test to see if the mixture will form a ball in cold water. Put a spoon into the hot mixture and drop a small amount into a cup with cold water. It should form a ball. Take saucepan off burner and let sit for 10 minutes. Add vanilla and walnuts and start beating fudge with a spoon until it changes colour (turns lighter brown) and becomes thick. Put into a greased pie plate and place in fridge to cool. Cut into squares and store in an air tight container.

Enjoy!


Posted by Jen B On Monday, September 14, 2015 1 comment
There was vanilla ice cream in the freezer last week, and even though it is lovely on its own, I took it as an opportunity to make a fancy dessert at home. And fancy in this case is also easy, as I made a mug brownie in the microwave to go with it. There is something so simple and amazing about mixing a hot brownie with cold ice cream. The ice cream melts, the desserts blend... it is fantastic. It tasted like something I would order at a restaurant for $6. Love it.


The brownie takes no time to make, as I've memorized the recipe. (Dangerous).

I made this brownie before with coconut oil, and you can find that recipe here.

Mug brownie:
1 tbs margarine, melted
1 tbs water
splash vanilla
dash salt
1 tbs cocoa powder
2 tbs sugar
2 tbs flour

Method: Mix the melted margarine, water, vanilla, and salt in mug. Whisk in cocoa powder until fully combined. Add sugar; whisk to combine. Add flour, whisk to combine. Microwave for 1 minute.

Top with some vanilla ice cream and enjoy!


Posted by Jen B On Friday, August 14, 2015 2 comments
Honey has been really expensive lately and my memory of buying a kg for less than $6 is a distant one. For the past few weeks the 1kg jar has been on super sale at Food Basics for $6.49, so we got some and I realized how much I missed it. Honey is so damn good.

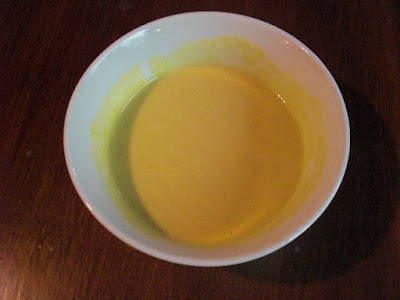
There was a sale on boxed chicken fingers/nuggets recently so we picked up a few boxes and I decided to make some honey mustard dipping sauce to go with them. I found a yummy recipe on allrecipes, which I cut in half and it made the perfect amount for both of us.


Honey Mustard Dipping Sauce
1/4 cup mayo
1 tbs prepared yellow mustard
1/2 tbs Dijon mustard
1 tbs honey
1/4 tbs lemon juice

Mix all ingredients together and chill overnight in the fridge. Enjoy!


Posted by Jen B On Wednesday, July 29, 2015 4 comments
I bought mayo a few weeks ago and it was shrink wrapped with a package of vegetable soup mix. The mayo was already on sale ($2.99) and the soup mix is normally $1.50 or so, so it was a surprise deal. And also a welcome suggestion: make some dip! So I made the famous spinach dip, but left out the spinach. So this dip is just vegetable soup mix dip, which is really amazing. I have been serving it with vegetable sticks or rippled chips and this dip makes both things even better. YUM!

All you need for this dip:
1 container sour cream (500ml)
1 cup mayo
1 package vegetable soup mix

Mix all together and wait a few hours for the vegetables to hydrate and the flavours to sink in. Enjoy!

Posted by Jen B On Friday, April 17, 2015 2 comments
There were two overripe bananas on the table the other day, and my normal practice is to put them in the freezer and save them until there's enough to make a couple loaves of my Mom's banana bread. I hadn't had banana bread in a while and decided I didn't want to wait and converted the recipe amounts in order to make a half dozen muffins.

I've altered Mom's recipe a tiny bit over the years (I use applesauce instead of melted butter), and the following is my version of the recipe.


Banana Bread Muffins (makes approx. 7)
Ingredients:
{Wet}
2 ripe bananas, mashed
1/2 cup brown sugar
2 tbs applesauce
1 egg
{Dry}
3/4 cup flour
1/4 tsp salt
1/2 tsp baking soda

Mix all wet ingredients in a bowl. In a separate bowl, mix all dry ingredients. Add dry ingredients to wet and stir until mixed. Fill muffin cups to about 2/3 full. Bake at 350°F for 25 minutes.


Enjoy!!

Posted by Jen B On Monday, March 16, 2015 6 comments
We've been making homemade tortillas for a while now, and we absolutely love them. They are cheaper than store bought (about $0.44 for 12 vs. $3.00+ for 10), and they taste amazing. Every time. Sometimes we've made them and I've rolled them too thin, and then they cooked too long, making them crispy instead of soft...and they were still amazing. Hard to roll stuff up in them, but they were great for dipping and snacking.

The recipe I use for my tortillas comes from this blog, which has a really great tutorial. I only have slight changes in my method, but otherwise pretty much the same. So happy I found it, as we make these all the time.

Ingredients:
3 cups all purpose flour
1 tsp salt
1/2 tsp baking powder
1/3 cup canola oil
1 cup hot tap water

Add flour, salt, and baking powder to large bowl and combine with a whisk. I love using a whisk to combine dry ingredients as it's so efficient. For this recipe, I use a giant silver bowl my Mom gave me and it works great.

Add 1/3 cup canola oil to flour mixture.


Mix with your fingers until it becomes fine crumbs.


Add 1 cup hot tap water.


Mix with your hands and form into a ball. Knead the ball 40 times (I just knead it right in the bowl).


Cover with a tea towel, and let rest for 30 minutes. Divide the ball into 12 discs. I do this by weighing the large ball and then making each disc a 12th of the weight. I like to measure because I'm not always great at eyeballing them to be the same size.


Let the 12 discs rest for 30 minutes.


Roll each disc into a tortilla around 8 inches wide. I don't flour my surface because they don't seem to need it. Sometimes they roll out into not quite circles, but they still work as tortillas.


Cook on a hot, ungreased pan for about one minute on each side. The tortillas will have a lot of bubbles when it is time to flip them. We use an electric griddle I got from Mom that works great for cooking two at a time. We turn it up to high and it is perfect.


Serve with a variety of different meals and enjoy. These are served with spicy chick peas and tomatoes on rice, wrapped up with Sriracha, cucumber dressing, fresh spinach, and diced purple onion. Yum!

Posted by Jen B On Monday, February 23, 2015 6 comments
I love making fudge with sweetened condensed milk, and have made several varieties over the past few years. One of the first flavours I tried was Reese's Fudge and I wanted to make it again, but I kept forgetting to pick up Reese's peanut butter cups. At some point I got the bright idea that I could make the peanut butter cups instead of buying them and that is exactly what I did. My sister-in-law has an awesome peanut butter cup recipe and I used it to make peanut butter patties for this recipe. I worked out the difference, and I saved over $3 in peanut butter cups by just making the patties at home. Win!

For the Peanut Butter Patties:
1/3 cup peanut butter
2 tbs + 2 tsp brown sugar
1 tbs margarine
1/3 cup icing sugar

Mix all ingredients together and roll into balls (makes approx. 25 balls). Chill them in the fridge for 3 hours. Remove from fridge and slightly flatten to form patties.


For the Fudge:
3 cups milk chocolate chips
1 can sweetened condensed milk (300 ml)
1 cup chopped peanuts
1 tsp vanilla
25 homemade peanut butter patties

Add chocolate chips and sweetened condensed milk to saucepan over medium heat.


Heat until melted together. Remove from heat and stir in vanilla.


Pour about a 1/4 of the mixture into a prepared 8x8 baking dish. Ensure the bottom is completely covered.

Place peanut butter patties onto the already poured fudge. Then cover them with the rest of the chocolate mixture.


Top with chopped peanuts, pressing gently to adhere to chocolate. Chill in the refrigerator. I always chill my fudge overnight for best results.


Once chilled, cut fudge into pieces for eating and sharing. This one is pretty great for both!


Posted by Jen B On Wednesday, January 21, 2015 5 comments
When we were kids, the Christmas Eve tradition at our house was to have appetizers for supper. Mom would bake some Triscuits in the toaster oven that were topped with cheese and sliced green olives. So good! We'd also have a selection of chips and dips and various other snacks. I'm not sure if we ever had mini crescent dogs in those days, but as an adult, they've been added to the Christmas Eve menu.

Mini crescent dogs are really easy to make and especially easy to eat. When they are mini, three of them is equal to one hot dog. So if you don't count how many you are eating (pro tip: never count how many you are eating), you may end up having more hot dogs than you normally would in one sitting. Which is kinda the best.

Ingredients (to make 24 mini crescent dogs):
1 can Pillsbury Crescents
8 hot dogs
cheese

Method:

1. Cut your hot dogs into three equal pieces. Cut cheese into small slices, about the same size as each third of a hot dog.


2. Slice each hot dog piece about half way through and stuff with cheese.


3. Open your can of Crescent Rolls and separate into triangles.


4. Cut each triangle into three, starting from the top point of the triangle.


5. Adjust your mini triangles, so you have a nice sized edge for rolling up hot dogs.


6. Roll up your hot dogs. This recipes is very forgiving, so don't worry how they roll up.


7. Place on a parchment paper lined baking tray and bake at 375°F for 12-15 minutes.


Enjoy!!!

Posted by Jen B On Wednesday, December 24, 2014 8 comments
I love easy fudge made with sweetened condensed milk. The more flavours I make, the more I want to try. Each one I've made has been a hit, and the recipe makes over 2 lbs so it really goes a long way. So far I've tried Reese's Fudge, Christmas Fudge, Oreo fudge, and Salted Butterscotch Fudge.

My most recent adventure was with mint chocolate fudge, and I found the recipe on Eagle Brand's website. I adjusted the method and made it in the microwave. This was the first fudge I made in the microwave, and although it was really easy, the fudge cooled a lot faster than the stove top method, so I had to move quickly to make sure it didn't set before I got it into the baking dish.  


Ingredients:
2 cups chocolate chips, divided (I used a mixture of dark and milk chocolate)
1 cup white chocolate chips
1 can sweetened condensed milk (300ml), divided
2 tsp peppermint extract
2 tsp vanilla, divided
Green food colouring

Method:
1. Line 8 x 8 square pan with parchment paper.

2. In a microwave safe bowl, melt together 1 cup chocolate chips and 1/2 cup sweetened condensed milk until blended (about one minute). Add 1 tsp vanilla and stir until combined. Spread evenly into pan for layer one of the fudge. Chill 10 minutes for layer to set.

Note: For ease of measuring the sweetened condensed milk, at this time I added the other cup of chocolate chips and another 1/2 cup of sweetened condensed milk to the microwave safe bowl. Set aside, as this will become layer three.

3. In another microwave safe bowl, add 1 cup white chocolate chips and the remainder of the sweetened condensed milk (it will be a little less than 1/4 cup). Melt in microwave until blended (about one minute). Mixture will be thick. Add peppermint extract and green food colouring and stir until combined. Spread over first layer of fudge. Chill for 10 minutes for layer to set.

4. Melt second bowl of chocolate chips and sweetened condensed milk until blended (about one minute). Add 1 tsp vanilla and stir until combined. Spread over second layer of fudge.

Chill until firm. I usually chill mine for 24 hours and it always sets up perfectly.


Posted by Jen B On Wednesday, December 03, 2014 4 comments
Yesterday I told you about some fancy cheese my Mom surprised me with. When I have fancy cheese in the house, my first thought is always "oh, I wish I had a baguette". Cheese and bread is a favourite of mine, it's so simple and delicious. Being baguette-less and not wanting to drive to the store (or to spend the $1.50-$4.00 for a store bought one) I wondered if I could make my own. I found a recipe in my bread maker recipe book, made some dough, and ended up with two 15" baguettes. The cost of all the ingredients (flour, sugar, salt, yeast) was about $0.75, so a significant savings if I make them myself. They were also super easy to make, as most of the prep was just waiting for dough to rise.

Homemade Baguettes:
1. Make dough in the bread maker (1 hour, 15 minutes)
2. Turn dough into a greased bowl, and let rise for 30 minutes
3. On a lightly floured surface, roll out dough with rolling pin until it is a big rectangle (this dough was incredibly easy to roll out)
4. Cut dough in half and roll each half up 'jelly roll style' and round out the ends
5. Let rise for 40 minutes, then cut some diagonal slashes in the top
6. Bake at 425°F for 10 minutes, turn down to 375°F and bake for an additional 8 minutes


The baguettes tasted great and were really easy to make. I'm so happy that I can make them at home and have a fresh baguette any time I need one.

Posted by Jen B On Tuesday, December 02, 2014 7 comments
I visited with Mom yesterday and she surprised me with a basket full of cheese, tea, and chocolate. She put it together herself, even shredding pieces of Christmas paper to make a bed of confetti for all the treats. Isn't she the best? I would have taken a photo but I was waaaaayyyy too excited to tear open my tea (Twinings Earl Grey), put the cheese in the fridge, and put the chocolate in my face.

Because of this wonderful gift, today I woke up with Gouda in my fridge. I knew I wanted to have some sort of sammie with it for lunch, so I Googled some ideas. I found this blog post that blended spinach, avocado, and Gouda for use in a kick ass grilled cheese. My bread options were limited, so I decided to eat mine as an open face sandwich.

I added a few handfuls of spinach to my mini food processor, and pulsed it until it was nice and chopped. Then I added half an avocado and pulsed it a few times to mix it with the spinach. Lastly, I added some chopped Gouda (thanks Mom!) and processed it until it looked spreadable.


I scooped my mixture onto a toasted bagel and then broiled it for about five minutes in the oven.


Yummy!

I'm also currently making some baguette dough in the bread maker so that I can eat more wonderful and fancy cheese with fancy bread.


Posted by Jen B On Monday, December 01, 2014 4 comments
Related Posts with Thumbnails
  • RSS
  • Delicious
  • Digg
  • Facebook
  • Twitter
  • Linkedin
  • Youtube

My Adorable Twitter

Let's connect!

What I'm Currently Reading

2015 Reading Challenge

2015 Reading Challenge
Jen has read 0 books toward her goal of 30 books.
hide

2014 Reading Challenge

2014 Reading Challenge
Jen has read 0 books toward her goal of 25 books.
hide

2013 Reading Challenge

2013 Reading Challenge
Jen has read 5 books toward a goal of 25 books.
hide

Suggested Reading

Suggested Reading

Good Eating

Active and Outdoorsy