It's my birthday tomorrow, so we had a big turkey dinner last night at Mom's. Like always, Mom's turkey was perfect and our bellies were full (over-full mostly). I elected to make a cake for last night's affair and I excitedly opted to make a Rainbow Cake.
Baking the cake was easy and fun. I used two white cake mixes, which I made one at a time and each became three layers of the cake. I absolutley love working with
colour paste and over the next while I am going to find any excuse to use them. Colour is fun!
 |
| Prepare cake mix |
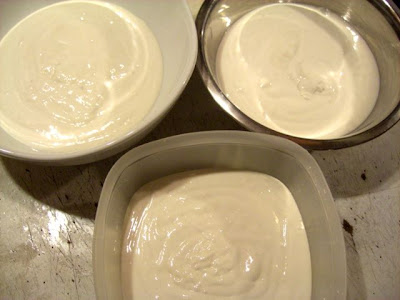 |
| Divide into three |
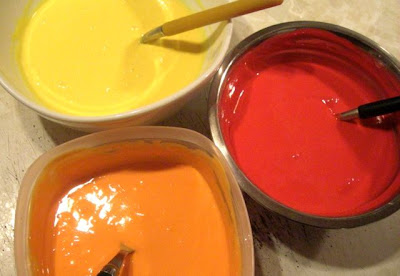 |
| Add colour (red, orange, yellow) and mix |
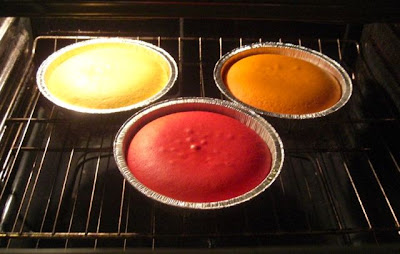 |
| Bake for about 22 minutes |
And repeat!!
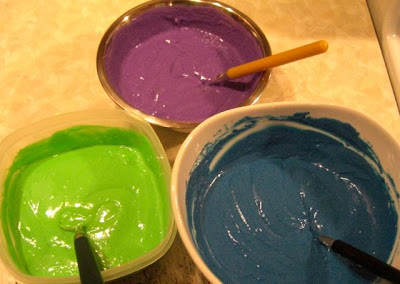 |
| Add colour (green, blue, purple) and mix |
|
 |
| And bake about 22 minutes |
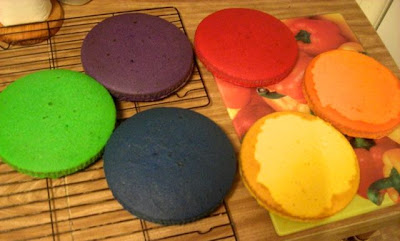 |
| All the colours of the rainbow - baked! |
The assembly of the cake was a little harder than baking,
which I detailed in yesterday's post. I excitedly stacked the layers together (with a little parchment paper between them), and when I unstacked them, each layer ripped a giant hole in the layer beneath it. Whoops! Also, the more I handled the layers, the more fragile they became, with the green one actually breaking in three. If I try this cake again I know it will go a lot smoother, and I'm happy to say the cake turned out awesome regardless of the difficulty I faced.
While dealing with cracking and breaking cake layers, I forgot to take photos of how it was assembled. And while decorating, I was just hoping that it didn't collapse, so no photos of that either. Just imagine it being assembled with lots of wishing and hoping that it would work out.
To cover the cake and ice between the layers, I needed almost three full cans of vanilla frosting. I wouldn't claim that I have awesome icing skills, and icing a multi-layer, multi-colour cake with a tonne of icing is hard. The crumbs of each colour layer seemed to actively jump onto the icing knife so they could spread themselves happily throughout the white icing. Every attempt at correcting it seemed to make it 100 times worse. But not to worry! The solution is to distract the people with sprinkles. Sprinkles are my new cake decorating best friend.
 |
| Also, it is super fun to throw sprinkles at a cake! |
Based on the complications, I wasn't really sure what it would look like inside. I'm so happy that it did not disappoint. This cake is definitely visually crowd pleasing. It tastes pretty great too.


